ラベル Centos の投稿を表示しています。 すべての投稿を表示

2018年6月19日火曜日

Centos7でRedmineを構築する

最近チームのタスク管理やら問い合わせ管理の方法で頭を悩ませている。
タスク管理ツールなのか、チケット管理ツールなのか、プロジェクト管理ツールなのか、問い合わせ管理ツールなのか、あるいはGoogleスプレッドシートが一番いいのか、まだ答えは出ていないが、候補の一つとして検討したRedmineが曲者だったので、メモを兼ねて。

さてしょっぱなから情けないが、Ruby on Railsの環境を構築してRedmineの公式パッケージをダウンロードしてきて、という王道の手順は挫折したことをお断りしておきたい。

今回はBitnamiのインストーラを使わせてもらった。

・・・が、さすが、構築ずっこけるとあちこちで言われているRedmine・・・。
それでも躓きが無いわけではなかったのでそのあたりもメモしておきたい。

環境は例によってCentos7をVirtualBox上でMinimalインストールした仮想マシンで進めたい。

ネットワークはNATでポートフォワーディングをひとまずこんな感じにしておく。

まずはwgetをインストール。
# yum install -y wget

やらなくても通るかもしれないが、変なところで邪魔されると嫌なので念のためSE Linuxを無効化。
# setenforce 0

# vi /etc/selinux/config
編集内容→SELINUX=disabled

Firewallでhttpを通す。
# firewall-cmd --add-port=80/tcp --permanent
# firewall-cmd --reload

bitnamiのインストーラをダウンロード。
# wget https://bitnami.com/redirect/to/225667/bitnami-redmine-3.4.6-0-linux-x64-installer.run
※インストーラの最新のURLはこちらで探す。

実行権限をつける。
# chmod 777 bitnami-redmine-3.4.6-0-linux-x64-installer.run

嵌りポイントここから


これで「./bitnami-redmine-3.4.6-0-linux-x64-installer.run」とインストーラ起動すれば、全部やってくれて楽勝じゃん、と思ったら・・・
/opt/redmine-3.4.6-0/mysql "****" :
/opt/redmine-3.4.6-0/mysql/scripts/myscript.sh: scripts/mysql_install_db:
/usr/bin/perl: 誤ったインタプリタです: そのようなファイルやディレクトリはありま せん
ERROR 2002 (HY000): Can't connect to local MySQL server through socket
'/opt/redmine-3.4.6-0/mysql/tmp/mysql.sock' (2)
ERROR 2002 (HY000): Can't connect to local MySQL server through socket
'/opt/redmine-3.4.6-0/mysql/tmp/mysql.sock' (2)
ERROR 2002 (HY000): Can't connect to local MySQL server through socket
'/opt/redmine-3.4.6-0/mysql/tmp/mysql.sock' (2)
続けるには [Enter] キーを押してください :
警告: インストール後の処理を実行中に問題が発生しました。インストールが正しく完了していない可能性があります
 実行中にエラーが起きました /opt/redmine-3.4.6-0/mysql/bin/mysql -h localhost -u root -p****
-S ../tmp/mysql.sock -e "CREATE DATABASE IF NOT EXISTS bitnami_redmine;GRANT ALL
PRIVILEGES on bitnami_redmine.* to 'bitnami'@'localhost' identified by
'****';flush privileges;" : Warning: Using a password on the command line
interface can be insecure.
ERROR 2002 (HY000): Can't connect to local MySQL server through socket
'../tmp/mysql.sock' (2)

なんか盛大にエラー吐いた。
Enterで継続するというので継続してみたが、当然インストールもずっこけてる様で、http://localhost/redmine/のページは404。。。

いろいろ調べた結果としては、
ここに書いてある通り、LAMPスタックをインストールする前に必要なperl-data-dumperが無いというのが原因なようで、事前に「yum install -y perl-data-dumperがworkaround」との事。
ちなみに「yum install -y perl-Data-Dumper」じゃないと通らない・・・。

ということで、perl-Data-Dumperを追加。
# yum install -y perl-Data-Dumper

嵌りポイントここまで


気を取り直してインストールする前のスナップショットに戻ってインストーラを起動。
# ./bitnami-redmine-3.4.6-0-linux-x64-installer.run

以下対話型インターフェースで、次のような感じ。
Language Selection

Please select the installation language
[1] English - English
[2] Spanish - Espanol
[3] Japanese - 日本語
[4] Korean - ???
[5] Simplified Chinese - ?体中文
[6] Hebrew - ?????
[7] German - Deutsch
[8] Romanian - Roman?
[9] Russian - Русский
Please choose an option [1] : 3
Bitnami Redmine Stack requires at least 2000MB of memory and the installer has detected 1811MB of memory. This may prevent the application from installing, working properly or cause it to stop functioning due to lack of memory. Visit the following link to learn how to increase the swap space.

https://bitnami.com/lowmemory

Continue with installation? [Y/n]: y

----------------------------------------------------------------------------
ようこそ Bitnami Redmine Stack セットアップウィザードへ。
----------------------------------------------------------------------------
インストールするコンポーネントを選択してください。インストールしないコンポーネントの選択を外してください。準備ができたら“次へ“をクリックしてください。

Subversion [Y/n] :n

PhpMyAdmin [Y/n] :n

Redmine : Y (Cannot be edited)

Git [Y/n] :y

上記選択部分が正しいことを確認してください。 [Y/n]: y

----------------------------------------------------------------------------
Installation folder

Bitnami Redmine Stack をインストールするフォルダを選択してください。

フォルダを選択 [/opt/redmine-3.4.6-0]:[Enter]
----------------------------------------------------------------------------
管理者アカウントの作成

Bitnami Redmine Stack の管理者アカウントを作成します。

表示用氏名 [User Name]: admin

Email アドレス [user@example.com]: admin@example.com

ログイン名 [user]: admin

パスワード :[YourRedminePassWord]
確認のためにパスワードをもう一度入れてください :[YourRedminePassWord]
----------------------------------------------------------------------------
データベースに保管する際の既定の言語

データベース設定の規定値として使用する言語を選択してください:

[1] Bosnian
[2] Bulgarian
[3] Catalan
[4] Czech
[5] Danish
[6] German
[7] English
[8] Spanish
[9] French
[10] Galician
[11] Hebrew
[12] Hungarian
[13] Italian
[14] 日本語
[15] 韓国語
[16] Lithuanian
[17] Dutch
[18] Norwegian
[19] Polish
[20] Portuguese
[21] Romanian
[22] Russian
[23] Slovak
[24] Slovenian
[25] Serbian
[26] Swedish
[27] Turkish
[28] Ukrainian
[29] Vietnamese
[30] Chinese
オプションを選択してください [14] :[Enter]

Do you want to configure mail support? [y/N]: n

----------------------------------------------------------------------------
お使いのコンピュータに Bitnami Redmine Stack をインストールする準備が整いました 。

続けますか? [Y/n]: y

----------------------------------------------------------------------------
しばらくお待ちください。 Bitnami Redmine Stack をお使いのコンピュータにインスト ール中です。

インストール中
0% ______________ 50% ______________ 100%
#########################################

----------------------------------------------------------------------------
セットアップウィザードによる Bitnami Redmine Stack のインストールが完了しました 。

Redmine アプリケーション起動 [Y/n]: y

情報: Bitnami Redmine Stack については、ブラウザで
http://127.0.0.1:80 にアクセスしてください。
続けるには [Enter] キーを押してください :[Enter]
さてhttp://localhost/に行ってみる。

Access Redmineへ。

無事成功。これでとりあえずいろいろ試してみることが可能。

2018年6月6日水曜日

Centos7にMoodle3.5を構築する

2021年03月追記:以下の手順では匿名様にコメント頂いている点と、こちら↓の記事で指摘されている問題があるようですので、ご参考にしてください。
https://moodle.org/mod/forum/discuss.php?d=376128

最近業務で使ったMoodleというLMS(Learning Management System)平たく言えばe-Learningのシステムの構築を今回は題材にしてみたい。

構築する環境としては、
https://arm-lab.blogspot.com/2018/06/centos-minimal.html
こちらの記事で作ったCentos 7 Minimalインストールの環境をベースにしていく。

※おおむね此方の方の手順(http://www.unix-power.net/networking/post-730)で行けたが、

  • 現在のMoodleの最新版(3.5)ではCentosのyumリポジトリで入れられるphpより新しいバージョンのphpを要求される点
  • Centos 7 ではSELinuxのおかげで「Fatal error: $CFG->dataroot is not writable, admin has to fix directory permissions! Exiting.」が出力される点
  • 次のエラーの解決
mysql_full_unicode_support#File_format
this test must passYour database uses Antelope as the file format. Full UTF-8 support in MySQL and MariaDB requires the Barracuda file format. Please switch to the Barracuda file format. See the documentation MySQL full unicode support for details.
Check
mysql_full_unicode_support#File_per_table
this test must passFor full support of UTF-8 both MySQL and MariaDB require you to change your MySQL setting 'innodb_file_per_table' to 'ON'. See the documentation for further details.
Check
mysql_full_unicode_support#Large_prefix
this test must passFor full support of UTF-8 both MySQL and MariaDB require you to change your MySQL setting 'innodb_large_prefix' to 'ON'. See the documentation for further details.
Check

等々細々いろいろ引っかかった点を、現在実現可能な手順に修正・追加・検証し、Centos7 + Moodle 3.5+で成功する手順を確立している。

maria DBのインストール

# sudo yum install -y mariadb mariadb-server

httpd(apache)のインストール

# sudo yum install -y httpd httpd-devel mod_ssl

※Moodle3.2では「Moodle 3.2 or later requires at least PHP 5.6.5」と要求されるがyumでインストールすると2018年6月現在「php-common-5.4.16-45.el7.x86_64」が入ってしまい、エラーを吐く経験があり今回使用するMoodle3.5でも当然phpのバージョンはyumリポジトリより新しいものが必要なので、epelリポジトリとRemiリポジトリを追加する。

epelリポジトリの追加

# sudo yum install -y epel-release

Remiリポジトリの追加

# rpm -Uvh http://rpms.famillecollet.com/enterprise/remi-release-7.rpm

php 7.1と必要なモジュールのインストール

# sudo yum install -y --enablerepo=remi,remi-php71 php php-devel php-mysql php-mbstring php-gd php-pear httpd-devel php-mysqli php-intl php-soap php-xmlrpc php-xml php-ldap php-pecl-zip

追加リポジトリの無効化

phpのと関連モジュールのインストールが終わったら、viでepelリポジトリの設定ファイルを開き、
# vi /etc/yum.repos.d/epel.repo

epelのenableを0=Falseに変更。
[epel]
~中略~
enabled=0
~後略~
※これをしておかないとyum update時に公式のパッケージもepelで置き換わってしまう。

ちなみに
# cat /etc/yum.repos.d/remi.repo
で確認したところRemiリポジトリの方はインストール後のデフォルト値がenable=0なので特に弄らないでよさそう。

phpの設定

# vi /etc/php.ini

変更点は次の通り
memory_limit = 2048M ※環境及び環境次第
post_max_size = 2048M ※環境及び環境次第
default_charset = "UTF-8"
upload_max_filesize = 2048M ※環境及び運用次第
date.timezone = 'Asia/Tokyo';1660行目
mbstring.language = Japanese
mbstring.internal_encoding = UTF-8
mbstring.http_input = pass
mbstring.http_output = pass

MariaDBの文字コード設定と有効化

# vi /etc/my.cnf

以下の内容に修正
[client]
default-character-set = utf8mb4
[mysqld]
datadir=/var/lib/mysql
socket=/var/lib/mysql/mysql.sock
# Disabling symbolic-links is recommended to prevent assorted security risks
symbolic-links=0
# Settings user and group are ignored when systemd is used.
# If you need to run mysqld under a different user or group,
# customize your systemd unit file for mariadb according to the
# instructions in http://fedoraproject.org/wiki/Systemd
innodb_file_format = Barracuda
innodb_file_per_table = 1
innodb_large_prefix
character-set-server = utf8mb4
collation-server = utf8mb4_unicode_ci
skip-character-set-client-handshake
[mysqld_safe]
log-error=/var/log/mariadb/mariadb.log
pid-file=/var/run/mariadb/mariadb.pid
[mysql]
default-character-set = utf8mb4
#
# include all files from the config directory
#
!includedir /etc/my.cnf.d

# sudo systemctl enable mariadb.service
# sudo systemctl start mariadb.service

# sudo mysql_secure_installation
Enter current password for root (enter for none):[そのままエンター]

OK, successfully used password, moving on...

Setting the root password ensures that nobody can log into the MariaDB
root user without the proper authorisation.

Set root password? [Y/n][そのままエンター]
New password:[your password]
Re-enter new password:[your password]
Password updated successfully!
Reloading privilege tables..
 ... Success!


By default, a MariaDB installation has an anonymous user, allowing anyone
to log into MariaDB without having to have a user account created for
them.  This is intended only for testing, and to make the installation
go a bit smoother.  You should remove them before moving into a
production environment.
~後略~
ここから先は全部エンターでOK。

Moodle用DB作成

# mysql -u root -p
Enter password:[YourRootPassWord]
Welcome to the MariaDB monitor.  Commands end with ; or \g.
Your MariaDB connection id is 12
Server version: 5.5.56-MariaDB MariaDB Server

Copyright (c) 2000, 2017, Oracle, MariaDB Corporation Ab and others.

Type 'help;' or '\h' for help. Type '\c' to clear the current input statement.

MariaDB [(none)]>create database moodle default character set utf8;
MariaDB [(none)]>grant all on moodle.* to moodle@localhost identified by '[YourDBPassWord]';
MariaDB [(none)]>flush privileges;
MariaDB [(none)]>quit;

Moodleのダウンロード

# sudo yum install -y wget
# cd /var/www/html/
# wget https://download.moodle.org/stable35/moodle-latest-35.tgz
※このURLはその時点で公式(https://download.moodle.org/releases/latest/)からダウンロードできるものを拾ってくる。

ファイルの展開と権限設定

# tar xvzf moodle-latest-35.tgz
# rm -rf moodle-latest-35.tgz

# mkdir /var/www/moodledata
# chmod -R 755 /var/www/
# chown -R apache.apache /var/www/

config.phpの設定

# mv config-dist.php config.php
# vi config.php

以下を変更
$CFG->dbtype    = 'mariadb';      // 'pgsql', 'mariadb', 'mysqli', 'sqlsrv' or 'oci'
$CFG->dbuser    = 'moodle';   // your database username
$CFG->dbpass    = '[YourDBPassWord]';   // your database password
$CFG->wwwroot   = 'http://localhost/moodle';
$CFG->dataroot  = '/var/www/html/moodledata';

SE Linuxの無効化

# setenforce 0
# vi /etc/selinux/config

SELINUX=enforcing
の部分を、
SELINUX=permissive
に変更。

Apacheの有効化と起動

# sudo systemctl enable httpd.service
# sudo systemctl start httpd.service

Firewallの設定

# sudo firewall-cmd --add-port=80/tcp --permanent
# sudo firewall-cmd --reload

80番ポートのフォワーディング設定を追加

※今回VirtualBoxをネットワークNATで使用しているため。
 詳しくは↓の記事参照。

ブラウザから諸設定

ブラウザで http://localhost/moodle/admin/index.php へ接続。


Continueをクリック。

チェックステータスの確認

今回の手順では次のようになった。

Server checks
php_setting
opcache.enable
PHP setting should be changed.PHP opcode caching improves performance and lowers memory requirements, OPcache extension is recommended and fully supported.
Check
unicode
must be installed and enabledOK
database
mariadb (5.5.56-MariaDB)
version 5.5.31 is required and you are running 5.5.56OK
php
version 7.0.0 is required and you are running 7.1.18OK
pcreunicode
should be installed and enabled for best resultsOK
php_extension
iconv
must be installed and enabledOK
php_extension
mbstring
should be installed and enabled for best resultsOK
php_extension
curl
must be installed and enabledOK
php_extension
openssl
must be installed and enabledOK
php_extension
tokenizer
should be installed and enabled for best resultsOK
php_extension
xmlrpc
should be installed and enabled for best resultsOK
php_extension
soap
should be installed and enabled for best resultsOK
php_extension
ctype
must be installed and enabledOK
php_extension
zip
must be installed and enabledOK
php_extension
zlib
must be installed and enabledOK
php_extension
gd
must be installed and enabledOK
php_extension
simplexml
must be installed and enabledOK
php_extension
spl
must be installed and enabledOK
php_extension
pcre
must be installed and enabledOK
php_extension
dom
must be installed and enabledOK
php_extension
xml
must be installed and enabledOK
php_extension
xmlreader
must be installed and enabledOK
php_extension
intl
must be installed and enabledOK
php_extension
json
must be installed and enabledOK
php_extension
hash
must be installed and enabledOK
php_extension
fileinfo
must be installed and enabledOK
php_setting
memory_limit
recommended setting detectedOK
php_setting
file_uploads
recommended setting detectedOK
Other checks
site not https
if this test fails, it indicates a potential problemIt has been detected that your site is not secured using HTTPS. It is strongly recommended to migrate your site to HTTPS for increased security and improved integration with other systems.
Check
×Your server environment meets all minimum requirements.


もしバージョンの微妙な変化等で「this test must pass」が出る場合は修正の必要がある。


上記であれば動作には特に問題ないので、Continueをクリックするとインストールプロセスが開始するので、終わるまで待つ。

あとはウィザードに従えばとりあえずログイン可能な状態までは終わるはず。

無事完了。

後日バーチャルアプライアンスで配布予定の設定は次の通り。
OS:root/root
Moodle:admin/Mood1e@Adm1n

一度仕事でやったことがあった割には1人日くらいかかった。やっぱメモとか手順って大事。

2018年6月2日土曜日

Centos + MATE Desktop + XRDPのリモート接続環境をVirtualBox上で構築する

前回MATE Desktopのインストールまで完了している
https://arm-lab.blogspot.com/2018/06/centos-minimalmate.html

この環境を前提としてRDPでリモート接続できる様にしたい。

なぜVNCではなくXRDPなのか?
→VNCクライアントソフトを追加インストールしなくてもホストOSに使っているWindowsマシンからRDPで接続できると便利な気がするから。

まずはxrdpサーバのインストール
# sudo yum --enablerepo=epel install -y xrdp

サービスの自動起動設定およびスタート
# sudo systemctl enable xrdp
# sudo systemctl start xrdp

接続するユーザのホームディレクトリに.Xclientsファイルを作成し権限を変更。
# echo "mate-session" > ~/.Xclients
# chmod a+x ~/.Xclients

FirewallのRDP用ポートを開く。
# sudo firewall-cmd --add-port=3389/tcp --permanent
# sudo firewall-cmd --reload


ここからはホストOS側で作業。


VirtualBoxのネットワーク設定でNATのポートフォワーディングを追加。
localhostの3389(RDPのデフォルトポート)をゲストOSの3389へ。

※当然ながらホストOS側でRDPサーバを動かしている場合はホストOS側のポートは別のポートにする。

ホストOS(Windows)からRDPクライアントを起動しlocalhostに接続してみる。

成功。

ちょっと嵌るかな?と思っていたが意外とすんなりできてよかった。
これでVirtualBox上のゲストOSのGUIが使いたいときも、融通の利かないVirtualBoxのウィンドウではなくRDPを使えるので、ホスト←→ゲスト間のコピペや画面サイズ等、融通の利く快適な作業ができるはず。


Centos Minimalインストールの状態から軽量デスクトップのMATEを導入

前回Centos Minimalの仮想マシンを作った。
https://arm-lab.blogspot.com/2018/06/centos-minimal.html

最近のLinuxでは結構GUIも使いたいケースが多いので今回は最低限のソフトとデスクトップのGUI環境を追加してみたい。


まずはepelリポジトリの追加。
# sudo yum install -y epel-release.noarch

viでepelリポジトリの設定ファイルを開き、
# vi /etc/yum.repos.d/epel.repo

epelのenableを0=Falseに変更。
[epel]
~中略~
enabled=0
~後略~
※これをしておかないとyum update時に公式のパッケージもepelで置き換わってしまうらしい。


yum.confにデフォルトと必須パッケージをインストールする設定が無ければ追加。

チェック
# cat /etc/yum.conf | grep echo group_package_types
追加
# sudo sh -c 'echo group_package_types=default,mandatory >> /etc/yum.conf'


X Window systemのグループインストール
# sudo yum --enablerepo=epel groupinstall -y "X Window system"


MATEをグループインストール
# sudo yum --enablerepo=epel groupinstall -y mate-desktop


ランレベル5にしてGUI環境へ
# sudo systemctl set-default graphical.target
# reboot


これで完了!・・・と思ったらGUIの日本語が化けているので、
# sudo yum install -y vlgothic-*
# sudo yum install -y ipa-gothic-fonts ipa-mincho-fonts ipa-pgothic-fonts ipa-pmincho-fonts
# reboot

今度こそ。

ログインもしてみる。

問題なさそうなので、この状態のマシンをバーチャルアプライアンスでエクスポートしておいて、今回は終了にする。

Centos Minimalをバーチャルボックスへインストールし仮想アプライアンスを作成

さて、いろいろ実験するのにメインのウィンドウズマシンの環境はあまり汚したくないのでバーチャルボックスでCentosを使うことにしようと思う。

容量削減と綺麗な環境からのシンプルな構築手順を確立したいので、まずはベースとなる最小限の構成のマシンを構築したいと思う。

バーチャルボックスは特に迷わずインストールできると思うので、既にインストールしているものとする。

まずはCentosのISOイメージをダウンロードしてくる。

https://www.centos.org/download/
こちらから、Minimal ISOを選択し、適当なミラーからダウンロード。

次にVirtualBoxを起動して新規のボタンから、仮想マシンを作成するのだが・・・

この画像のようにバージョンのリストで32-bitのOSのみ表示され64-bitが選べない場合は、仮想化支援機能(VT-x/AMD-V)の設定がBiosで無効になっている。
その場合は各PCのBios設定方法を調べてこの機能を有効化する必要あり。

そうすると、この通り無事64ビットも選択できるようになった。

仮想化支援機能は個人向けPC等では特にデフォルトで無効に設定されていることが多い様だが、有効だと何か問題でもあるのだろうか?

それはさておき、今回インストールするCentosはRedhat系なのでLinux Red Hat 64bitを選択しておく。

次にストレージの設定で、ディスクアイコンの+の部分をクリックし、ダウンロードしたISOイメージをマウントする。

こんな状態だ。

もう少し設定が続く。
ネットワーク設定だが、今回はNatにしておく。

VirtualBoxのネットワークについては初めて使ったときは理解がなかなかできなかったのでそのうちまとめようと思うが、今回はとりあえず手順通り進める。
localhost:22でsshでゲストOSにアクセスできるように、同じ画面で「高度」を展開し、「ポートフォワーディング」を設定しておく。

バーチャルボックスのNAT及びNATネットワークではホストOSからゲストOSに対してはそのままだとIP疎通できないので、このポートフォワーディングを入れておくほうが便利である。

書き忘れたが、メモリやCPUのコア数、ディスクサイズ等は、各環境に応じて設定しておけばよいと思う。

これらの設定が出来たら、OKを押して、保存し、いよいよ「→」ボタンでVMを起動していく。

Install Centosを選択しエンター。

Centos7では今のところネットワークがデフォルトだと自動接続でインストールされないようなので、ネットワークとホスト名の設定画面を開き、


Ethernet(ens0s3)をオンに変更しておく。

インストール先の設定は開いてそのまま完了でOK。

そしたらインストールの開始。
ROOTパスワードのみ設定しておく。ユーザはご自由に。

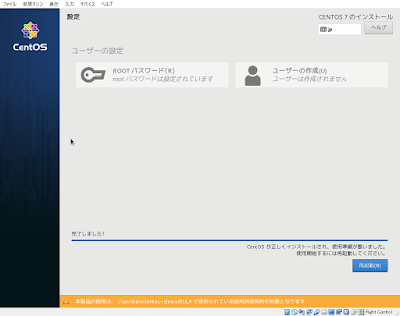
あとはしばらく待つだけ。再起動をクリック。

起動後、設定したパスワードでログインし、ip a。
このように10.0.2.15/24でIPがとれていればOK。

Teratermか何かでlocalhostにsshで接続してみる。

無事成功。

shutdown -h nowでVMを落とし、この環境をVirtualBoxの「ファイル」→「仮想アプライアンスのエクスポート」から、バーチャルアプライアンスとしてエクスポートしておく。
この.ovaファイルをインポートすれば、いつでもこのシンプルな環境を復旧しそれを土台に様々な実験が可能な準備が整った。


ウェブサイトのURLにおけるトレイリングスラッシュの解釈と有無による動作の違い

インターネットが現代社会におけるコミュニケーションの基盤となっている今日、ウェブサイトのURLはビジネスや個人ブランディングにとって重要な役割を果たしています。URLは単にウェブページへの経路を示すだけでなく、SEO(検索エンジン最適化)においても重要な要素です。この記事では、U...